When it comes to working with acrylic, precision cutting is essential for achieving clean edges and flawless results in your projects. Whether you’re a seasoned professional utilizing laser cutting or a DIY enthusiast, having the right tools and techniques at your disposal can make all the difference. In this tips for cutting acrylic sheet guide, we’ll explore some of the best methods for cutting acrylic effectively.
- Circular Saws: Circular table saws and handsaws equipped with carbide-tipped blades are excellent choices for cutting acrylic. Ensure the blades have a tooth pitch of 13 mm for optimal performance. Always use sharp blades dedicated solely to acrylic cutting to maintain edge quality. When using circular saws:
- Adjust the blade to protrude slightly over the acrylic sheet.
- Use a stop to maintain precise cuts.
- Avoid tilting the material during cutting.
- Secure the material to prevent flutter.
- Maintain a steady feed rate.
- Consider cooling the acrylic with water or compressed air, especially for thicker sheets.
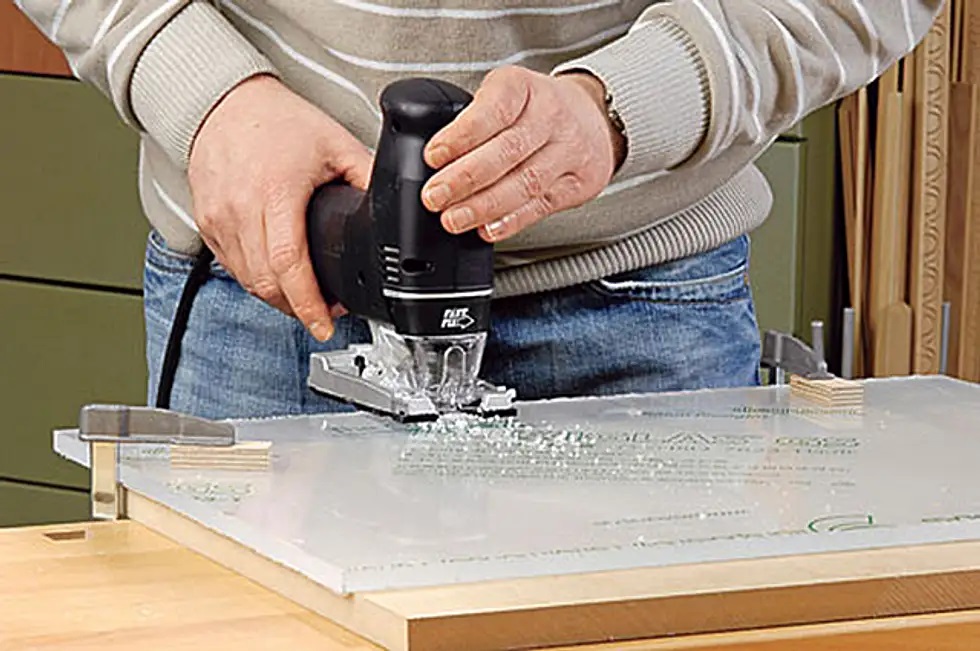
- Jigsaws: Jigsaws offer versatility and manoeuvrability, making them suitable for curved or intricate cuts in acrylic. Follow these steps for efficient jigsaw cutting:
- Start cutting only when the saw is running.
- Ensure the shoe of the jigsaw firmly rests on the masking film of the acrylic sheet.
- Maintain an average cutting speed and adjust stroke action accordingly.
- Control the feed rate to prevent overheating.
- Consider cooling the acrylic for better results.
- Scroll saws and Hacksaws: Scroll saws are ideal for detailed cuts, while hacksaws are suitable for thinner acrylic sheets. Keep these tips in mind:
- Use scroll saws for intricate designs on thinner acrylic sheets.
- Limit hacksaw cutting to sheets up to approximately 4.5 mm thick.
- Maintain sharp blades and adjust cutting conditions for clean edges.
- Scribing and Breaking: Scribing and breaking provide a simple method for cutting thinner acrylic sheets. Follow these steps:
- Scribe the workpiece multiple times, with the number of scribes corresponding to the sheet thickness.
- Utilize a knife with a hook-shaped edge for precision.
- Break the acrylic along the scribed line over the edge of a table or using controlled pressure.
- Sand any broken edges for optimal bonding.
By employing these techniques and selecting the appropriate tools for your project, you can achieve precise cuts and professional results. Remember to prioritize safety by wearing appropriate protective gear and always follow manufacturer guidelines for tool usage. With practice and attention to detail, you’ll master the art of acrylic cutting in no time.
Please note: The above tips for cutting acrylic sheet are to be used as a guide only and should not be taken as instruction. We take no responsibility for any damage caused as a result of this advice.